Building a Game Lobby
With the session created, you
move into the game lobby that lists the players in the session and
whether they are ready to play the game until the host starts the game.
The game is in GameLobby state, so add to the switch statements in the Update and Draw methods so they know what to do while you are in this state.
In the game’s Draw method, add the following to the switch statement.
case GameState.GameLobby:
    GameLobbyDraw();
    break;
The GameLobbyDraw
method draws the current players in the session and their current ready
and talking state. Add the following method to your game:
// Draw method for the GameLobby GameState
private void GameLobbyDraw()
{
    spriteBatch.Begin();
    spriteBatch.DrawString(spriteFont, "GAME LOBBY", new Vector2(10, 10), Color.White);
    spriteBatch.DrawString(spriteFont, "Mark Ready Status - Press A",
                                       new Vector2(10, 50), Color.White);
    spriteBatch.DrawString(spriteFont, "Exit - Press Back",
                                       new Vector2(10, 90), Color.White);
    if (networkSession.IsHost)
        spriteBatch.DrawString(spriteFont, "Start Game - Press Start",
                                           new Vector2(10, 130), Color.White);

    // Draw all games in the lobby
    spriteBatch.DrawString(spriteFont, "PLAYERS IN LOBBY",
                                       new Vector2(10, 220), Color.White);
    float drawOffset = 0;
    foreach (NetworkGamer networkGamer in networkSession.AllGamers)
    {
        spriteBatch.DrawString(spriteFont, networkGamer.Gamertag + " - " +
                                            ((networkGamer.IsReady) ? "READY" :
                                                                     "NOT READY") + " " +
                                            ((networkGamer.IsTalking) ? "TALKING" : ""),
                                            new Vector2(10, 260 + drawOffset),
                                            Color.White);
        drawOffset += 40;
    }

    spriteBatch.End();
}
GameLobbyDraw first draws the menu title of GAME LOBBY and instructions on how to mark your ready status by pressing the A button and how to exit by pressing the Back button. If the machine is the host, then instructions on how to start the game are also displayed.
It then loops over all of the NetworkGamer instances in the session by using the AllGamers property of the NetworkSession. You then write out their Gamertag
and whether they are ready and whether they are talking. Every gamer
can mark whether he or she is ready to play the game or not. This is
just a status indication and does not prevent the host from starting the
game.
In the game’s Update method, add the following to the switch statement.
case GameState.GameLobby:
    GameLobbyUpdate();
    break;
The GameLobbyUpdate
method enables players to exit the lobby and mark whether they are
ready to play or not. If the machine is also the host, then you also
allow for the host to start the game. Add the following method to your
game:
// Update method for the GameLobby GameState
private void GameLobbyUpdate()
{
    // Move back to the main menu
    if (ButtonPressed(Buttons.Back))
    {
        networkSession.Dispose();
        gameState = GameState.MainMenu;
    }
    // Set the ready state for the player
    else if (ButtonPressed(Buttons.A))
        networkSession.LocalGamers[0].IsReady = !networkSession.LocalGamers[0]. IsReady;
    // Only the host can start the game
    else if (ButtonPressed(Buttons.Start) && networkSession.IsHost)
        networkSession.StartGame();
}
NetworkSession provides a property called LocalGamers, which contains SignedInGamer
references for all of the players in the session that are local to the
machine. Because you know that there is only one local player in the
session, you can use the 0 index. If you allow multiple players, check
which controller pressed a button and update the correct index. Setting
the IsReady property sends the state to all of the players in the session.
If the host presses the Start button, then the game starts by calling the NetworkSession.StartGame method. When the game begins, the GameStarted event fires and the event handler updates the current GameState to PlayingGame.
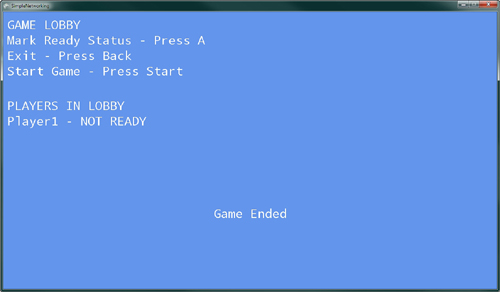
Running the game now enables you to create the session and join the lobby, which should look similar to Figure 6.

Playing the Game
Now that the game has started, take the local users’ input and update the position of their GameObject
to move across the screen. Then, send the local players’ state to all
of the players in the session and read any state that has been sent to
you from other players. The game is quite simple—draw the players’ Gamertag at their position.
Because the game is in PlayingGame state, add to the switch statements in the Update and Draw methods so they know what to do while you are in this state.
In the game’s Draw method, add the following to the switch statement:
case GameState.PlayingGame:
    PlayingGameDraw();
    break;
Now add the PlayingGameDraw method to your game using the following code:
// Draw method for the PlayingGame GameState
private void PlayingGameDraw()
{
    spriteBatch.Begin();
    spriteBatch.DrawString(spriteFont, "PLAYING GAME", new Vector2(10, 10), Color.White);

    // Draw each players name at their position in the game
    foreach (NetworkGamer networkGamer in networkSession.AllGamers)
    {
        GameObject player = networkGamer.Tag as GameObject;

        spriteBatch.DrawString(spriteFont, networkGamer.Gamertag +
                                            ((networkGamer.IsHost) ? " (HOST)": "") +
                                            ((networkGamer.IsTalking) ? " TALKING" : ""),
                                            player.Position,
                                            Color.White);
    }

    spriteBatch.End();
}
The PlayingGameDraw method loops through all of the NetworkGamer instances in the NetworkSession.AllGamers collection, which contains all of the players in the session. The Gamertag of each gamer is draw to the screen at the position stored in the GameObject for the gamer. If the gamer is the host or is talking, display text next to the Gamertag that shows those values.
To send and receive data,
you need two additional member variables for your game. Add the
following member variables to your game:
// PacketWriter and PacketReader used to send and recieve game data
PacketWriter packetWriter = new PacketWriter();
PacketReader packetReader = new PacketReader();
The PacketWriter and PacketReader are helper classes that help with sending and receiving data across the NetworkSession. Use these to write and read each player’s state.
In the game’s Update method, add the following to the switch statement.
case GameState.PlayingGame:
    PlayingGameUpdate(gameTime);
    break;
The PlayingGameUpdate
method is responsible for updating the game state for each of the local
players and sending their state to all of the players in the session.
The state of the other players in the session is read and their GamerObject is updated to their current state. Add the following method to your game:
// Update method for the PlayingGame GameState
private void PlayingGameUpdate(GameTime gameTime)
{
    // Check to see if the player wants to quit
    if (ButtonPressed(Buttons.Back))
    {
        // If the player is the host then
        // the game is exited but the session
        // stays alive
        if (networkSession.IsHost)
            networkSession.EndGame();
        // Other players leave the session
        else
        {
            networkSession.Dispose();
            networkSession = null;
            gameState = GameState.MainMenu;
        }

        return;
    }

    // Use GamePad to update the position of the local gamers
    // Loop all of the local gamers
    foreach (LocalNetworkGamer gamer in networkSession.LocalGamers)
    {
        // Handle local input
        GamePadState gamePadState = GamePad.GetState(gamer.SignedInGamer.PlayerIndex);

        // Get the GameObject for this local gamer
        GameObject gameObject = gamer.Tag as GameObject;
        Vector2 position = gameObject.Position;

        // Update the position of the game object based on the GamePad
        Vector2 move = gamePadState.ThumbSticks.Left *
                       (float)gameTime.ElapsedGameTime.TotalSeconds * 500;
        move.Y *= -1;
        position += move;
        gameObject.Position = position;

        // Write the new position to the packet writer
        packetWriter.Write(position);

        // Send the data to everyone in your session
        gamer.SendData(packetWriter, SendDataOptions.InOrder);
    }

    // Read data that is sent to local players
    foreach (LocalNetworkGamer gamer in networkSession.LocalGamers)
    {
        // Read until there is no data left
        while (gamer.IsDataAvailable)
        {
            NetworkGamer sender;
            gamer.ReceiveData(packetReader, out sender);

            // We only need to update the state of non local players
            if (sender.IsLocal)
                continue;

            // Get GameObject of the sender
            GameObject gameObject = sender.Tag as GameObject;

            // Read the position
            gameObject.Position = packetReader.ReadVector2();
        }
    }
}
First, PlayingGameUpdate checks whether the player has pressed the Back button asking to quit the game. If the current machine is the host, then NetworkSession.EndGame is called,
which fires the corresponding event that sends everyone in the game
back to the lobby. If the player is not the host, then dispose of the NetworkSession and set the state to return back to the MainMenu.
Next, all of the LocalGamers are looped and the GameObject.Position value is updated using the GamePad input. After the position of the local gamer is updated, the new position is written to the PacketWriter and set to everyone in the session using NetworkSession.SendData.
There are a number of overloads to SendData—the one in this sample takes two parameters. The first is the data to send which takes the PacketWriter. The second defines how the data should be sent using the SendDataOptions enumeration.
The Internet is a like a major
highway with a lot of traffic. That traffic can be moving fast or can
get into traffic jams. There are also multiple routes from one point to
another. When you send data across the network, the data is broken down
into packets. Each packet is sent from your machine to another across
the network. Depending on the network conditions, some packets can get
lost and never get to the recipient; others might get stalled and get
behind packets sent after themselves.
SendDataOptions
enables you to specify how you would like the data to be handled. XNA
can guarantee that packets be delivered by checking whether the other
machine receives the packet and sending the packet again until it is
received. As you can imagine, this creates more overhead because there
is more data sent that ensures the packets are received. If you want to
guarantee that the packets are received, use the Reliable
option. XNA can also guarantee that the packets are received in order.
If you want the packets to arrive in order, then use the InOrder option. You can also specify ReliableInOrder,
which guarantees the data is both in order and is delivered. If you
aren’t concerned about lost packets and data order, use the SendDataOptions.None option.
Note
An overload of NetworkSession.SendData enables you to specify a specific NetworkGamer to send the packets to.
Now that the data is sent, read the data that was sent to your local gamers. Remember that the LocalGamers are looped. The LocalNetworkGamer.IsDataAvailableLocalNetworkGamer. LocalNetworkGamer.ReceiveData is called to read the data sent from other players. ReceiveData takes two parameters. The first is the PacketReader and the second is the NetworkGamer who sent the data. property is used to check whether there is more data to read for a specific
The sender is checked to see whether it is local to the session using the IsLocal
property. If it is a local gamer, then you don’t need to update the
position because you would have already done so previously. If the data
came from another player in the session and was not local, then the GameObject for that player is updated with the position read from the PacketReader.
Note
There
are multiple ways you can set up your game to send data across the
network. This sample uses a technique called peer to peer, which sends
all of the data from each user in the session to all other players in
the session.
Another way you can send
the data is called client-server model. With client-server, there is one
machine that contains the current state of the game and sends that
state to all of the other machines in the network called clients. Each
client talks only to one machine, which is the server.
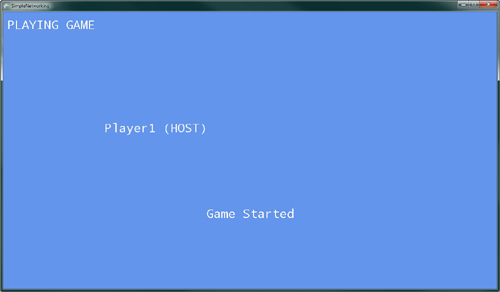
Now that you are sending
and receiving data, the game is ready to be played. Running the sample
now should enable you to create a session and start the game from the
lobby. Figure 7 shows the host playing the game alone.
If you press the Back button, you quit the game and are returned back into the lobby as shown by Figure 8.